Corrugated Cardboard

Meet the judges: Lullatone

We have another cardboard aficionado joining our team of judges! Shawn James Seymour of the Japan-based band, Lullatone. Shawn knows a thing or two about making incredible cardboard stuff. He teaches kids how to make a variety of musical instruments out of cardboard for a local television show here in Nagoya, Japan.

Whether you know it or not, you've probably heard Lullatone's beautifully soft yet vibrant music. They've done commercial work for clients like Target, Volkswagen and Anthropologie, but my daughters' love the clip they did for a Japanese female hygiene products company called Laurier the most. Check it out.

If you haven't heard Soundtracks for Everyday Adventures, their latest album, let me just say it's one of our favorites. Usually we put it on while we're doing things together like working on puzzles or cutting up vegetables for dinner. This is also an album I love to listen to when I'm just sitting around in my living room making stuff out of cardboard during nap time.

And one more little tip for you. If you ever need to calm down a cranky baby, try this Lullatone masterpiece. It works every. time. Thanks so much for joining us Shawn!

Will You Join Me? A Global Cardboard Challenge

Have you heard the news? The Imagination Foundation, (the people behind the short film, Caine's Arcade) are hosting a global day of cardboard play!

While I'm busy organizing an event here in Tokyo and getting ready to unleash our first cardboard challenge here on The Cardboard Collective, I wanted to get the word out to all of you so that you can get the ball rolling in your neck of the woods.

The Imagination Foundation has put together organizing kits with resources and ideas for hosting an event in your community.

We would love to publicize your event here on The Cardboard Collective as well, so this is an invitation to all of you cardboard creatives out there....Will you join me?

Cardboard + Your Car = Sun Dried Banana Chips

Materials used: cardboard, parchment paper, masking tape and an egg slicer is great for getting the bananas the right width for drying, but you can use a knife just as easily.

It's taken a while, but my whole family is starting to get excited about cardboard.

I've got a few posts in the works inspired by mom, dad, and this post idea was sent by my sister who lives out in sunny Santa Fe, New Mexico USA. (see the little adobe house behind her truck?)

The bananas take about 4 hours to dry in her car in New Mexico. It could take a little longer in other places, but with the heat wave that's been sweeping the US,  maybe not?

Is this not perfection? The BEST summer snack!

My sister said that she's thinking about doing kiwi and apricot next, maybe even some  cantaloupe. But she said the best part is that it leaves a nice dried banana smell in your car.

Thanks Sis! This is fantastic!

Ikebana-Inspired Teacup Arrangements

I snapped this photo of Electra playing with some leftover flowers from my Ikebana class  earlier this week and started thinking about how I could downsize this "Big Box" arrangement into something that would be more easily displayed.

Enter the teacup.

I always love arranging in open-mouthed containers and teacups are just the right size to display at dinnertime without overwhelming the food and conversation.

So, here's my post about cardboard, teacups, and toddler flower arranging for the fabulous TinkerLab's flower challenge that starts today. If you haven't seen Rachelle's site, I highly encourage you to head on over there and check it out. She's got amazing activities and lots of ideas for turning your home into a creativity and innovation haven for your whole family.

You might be familiar with some of these traditional kinds of Japanese kenzan or "frogs" as my mom calls them. There are also glass and iron versions in beautiful shapes, and some are highly collectible.

The only problem with these types of kenzan is that they don't sit well in the bottom of a teacup. The tapered shape of the cup makes them wobbly and difficult to work with. For that reason, I came up with two different kinds of cardboard fixtures that could be used to stabilize the flowers, and were easy for little hands to use as well.

The first fixture is made out of a rubber band and cut up cardboard tubes. This style worked well for our white teacup that was relatively small in diameter. It's hard to construct this style if the diameter of the container is too big without ending up with a bunch of rubber bands and cardboard pieces shooting all over your kitchen. You also need to be careful not to let the cardboard tubes touch the water. They will melt.

The second fixture is made by tracing the mouth of the teacup onto waxy fruit box cardboard, and then cutting it down until it fits securely inside the cup. I poked holes in the cardboard with an awl but you can easily use a Phillips head screw driver or a nail. You want to make holes big enough for flower and foliage stems to easily fit through.

Negative Space

Don't fill the entire fixture with holes. You want to leave some negative space that you can later cover up with moss or some other kind of low-lying ground plant. If you use the cardboard tube style kenza, just leave about half of the space empty. This can really open up the arrangement and make it more pleasing to the eye.

We had a great time going out to collect plant materials together. Electra is learning to use scissors, so this was a great way for her to put her new skills to use. I have a pair of clippers that are spring-loaded, so they were very easy for her to use and I just carefully supervised her, helping point out stems that were a little easier to cut through.

We chose a large variety of foliage and flowers searching for as many different shapes and textures as we could find. We had so many great conversations when we were out flower picking in the little neglected spaces around our neighborhood. Electra cried, "Momma, you have to smell this one!" and "Feel how fuzzy this leaf is!"

When we got home we laid down newspaper and trimmed some of the stems, removing any leaves that would come close to the water. It was wonderful to finally just sit back and let Electra create her own arrangement.

After Electra finished arranging the flowers we covered the remaining part of the fixture with some luscious green moss. She was so proud of her arrangement!

I know she'll be eager to try again next week, perhaps with some clippings from our balcony garden? Nasturtium, fennel, mint and lavender sound like a delicious combination for celebrating summer vacation at this time next week!

Be sure to check out other blogger's submission at TinkerLab's Flower Challenge Blog Hop / Linky Party.
Urban Gardening with Cardboard Planters

I made the cardboard planters by cutting a pineapple box to the desired size through both layers and then inverting the inner box. I also used a few strips of washi tape to brighten things up a bit and make the planter more secure.

I used the same concept to make the cardboard steps. I had to cut a second box to fit inside the top step for more support, but it does the job for Electra's small time guerrilla gardening project in our stair well.

I've learned after a few years of living in Japan that you can get away with anything that is super cute / Kawaii (rhymes with Hawaii).

......Like a little girl growing a morning-glory in cardboard pot.

Flip it over and it's a custom sized box or planter...

The planter on the right is what sparked the idea for making cardboard planters in the first place. They're called Wonderpots, and they're made from 100% recycled material. I've used them for the last 4 years and they work great. They last about two years before decomposing to the point that they need replacing.

My recent discovery of the waxy cardboard fruit boxes has got me thinking in a million directions. And the cardboard planter experiment will be the ultimate test of their strength.

I didn't even glue or tape this planter together. I just set it in the planter holder. The only thing I did was poke a few holes in the bottom of the planter to provide drainage.

So far we've got a young crop of edamame and edible-pod peas going strong. We'll see how our cardboard planter experiment holds up after a summer of growth and watering.

What about you, have you ever tried planting your annuals in cardboard?

Cardboard Bookshelf Organizers

As Electra dives deeper into the world of (pre) reading and books, we're trying to get a handle on our bookshelf.  I made this Maisy cardboard bookshelf divider for Electra as an experiment to see if it would help her understand that we can group books, and also guide her in putting her books away more easily. So far the divider has helped on both accounts, and I'm hoping to make some more dividers that correspond with our seasonal books, like a Christmas tree for Christmas, a heart for Valentine's Day, and a jack-o-lantern for Halloween.

I traced the Maisy character onto computer paper, colored it, cut it out and glued it to the heavy duty wax treated cardboard I talked about in the Wheels on the Box post. I learned the hard way after hacking through a normal piece of corrugated cardboard that you really need the strength and rigidity of the waxy fruit box cardboard for this divider to hold up. (You can see my first and second tries below.)

I had to use quite a variety of tools to recreate Maisy's chiseled features, including scissors, craft knife and mini cardboard saw, so I'll have to get back to you on the quick and dirty way of getting through this tough cardboard. (If you have any suggestions I'd love to hear your ideas in the comment box.)

Maisy is a character from a series of books written and illustrated by Lucy Cousins. We especially love Maisy because we can get a bilingual version in English and Japanese that we check out from our local library. We have learned colors, shapes, textures and so much vocabulary from reading these books together. Maisy or Lucy, if you're reading this, thank you for all the adventures!

The Wheels on the Box

Just add Wheels... During our last trip to 0123 Harappa the girls really enjoyed the cardboard box sleds that they had. I kept thinking about how we could make an adaptation using castor wheels and some hardware from the local DIY home store. The real discovery however proved to be the strength and durability of a certain breed of fruit and vegetable boxes.

Dad's old necktie makes a great and easy pull strap. Just thread it through the holes and tie a square knot.

By the way, we've been putting castor wheels on everything in our house.

Utilizing our cardboard hitch, Electra starts up her own tricycle transport for babies business. (Kitchen to tatami room connections offered daily.)

Besides the scary warning akin to those found underneath your mattress, I found out that this box is built to hold up to 55 kilos!! It also has a water-resistant and wipe-able waxy finish (mothers rejoice!) which I believe must help combat mold and mildew during transport of fruits and veggies.

Scour your local grocery store for one of these sturdy boxes. I'm sure your friends in the produce department would be happy to help you out!

I found the castor wheels for about $ 0.99 a piece and then looked for nuts and bolts to fit the castor wheels. The bolts are about 2 cm in length. Just enough to accommodate the castor wheels and the single walled box.

Using a leather punch, (but you could also use a small Phillips head screwdriver) I punched holes in the bottom of the box that corresponded with the holes on the bottom of the castor wheels.

I found out after a few days of play and finding lost nuts all over the place, that you should orient the bolts so that the nuts are attached on the inside of the box. (OK stop giggling!)

I cut an extra piece of cardboard to act as a liner and provide a little more strength and rigidity to the bottom of the box. It also provides some protection from the bolts sticking up when the girls are riding inside.

Of course don't forget to decorate the box to look like your favorite fire truck, school bus or train car. (We haven't gotten that far yet.)

A cardboard box with wheels is a wagon, a trailer, a wheelbarrow, a hangout spot, and all around super fun toddler toy.

Yay cardboard!

Getting Sorted with Cardboard Magnets...

This latest project began when I started shamelessly digging through someone's recycling bin on the way to the train. It turned out that a neighbor was parting with a stainless steel file sorter with trays, as well as an over-sized rectangular tin. Hmm I thought, I know these are just what I need...

So after a wash, I realized that the tin was perfect for storing all of our cardboard letters and tinker toys. And since it's a tin... it was perfect for magnetizing (/monetizing? I wish) our letters.

I also made a little lime green cardboard frame which has magnets on the back for doing letter and number sorts. I tell Electra, "Put all the numbers you can find in the square." or "Which of these are from the Japanese hiragana alphabet?"

Spelling out "to-ma-to" in Japanese hiragana...

(Finding 5's... (You can see the fan card for "Ran" from Electra's first pony ride. ))

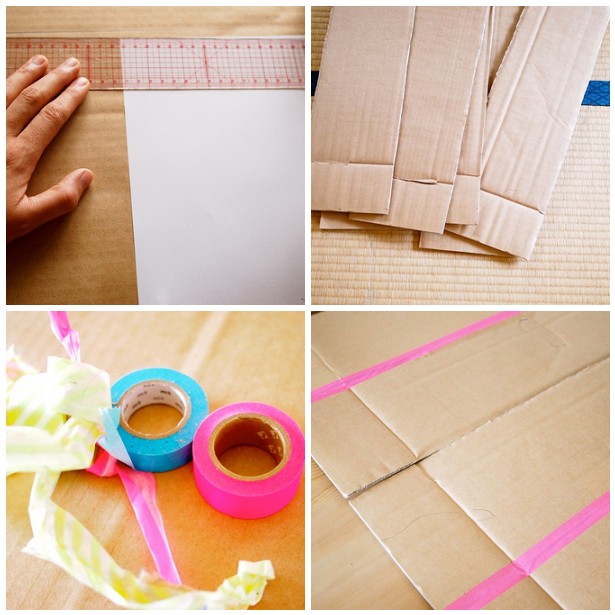
My luck continued when that night I received an early Mother's Day gift, from MY mother! It was packaged in the perfect cardboard box. After applying some washi tape stripes to the side, reinforcing the inside and pasting a pretty picture on the top we were all set. A perfect fit, and a divider in the middle for our bilingual magnets.