
I've been playing around with making templates and shapes from things you find in the kitchen, so here's a funny little animal that was born out of that process, and was inspired by some similar wood and ceramic pieces I've seen on the internet as of late.
You'll need a cardboard tube, corrugated cardboard, scissors, white glue, a drinking glass and a spoon.
Simple Steps:
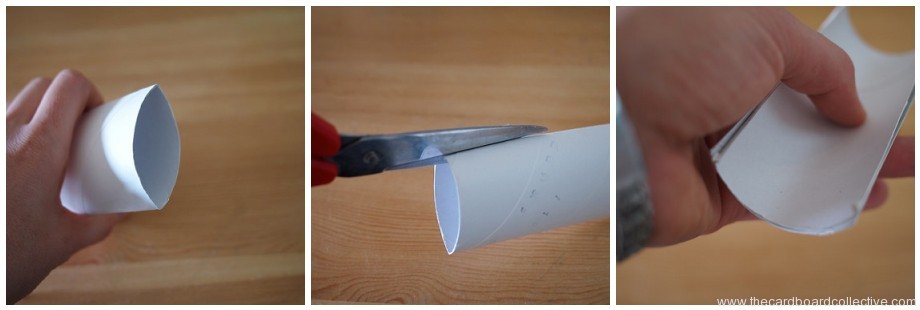
1. Flatten the toilet paper tube and cut along both creases to cut the tube in half. 2. Layer the two halves of the tube together to make the cradle for the organizer.
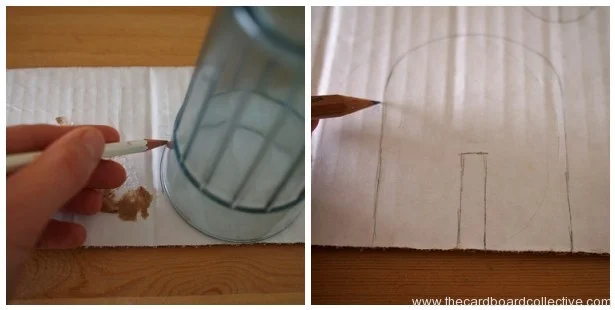
3. Use the mouth of the drinking glass as a form to trace the curves for the front and back of the bear's hips and shoulders. Cut.
4. Trim the tube to the desired length and assemble the organizer by gluing the tube to the hip and shoulder pieces. Secure with a rubber band while drying.

5. Use the base of the drinking glass as a form to trace the bear face, add ears, cut. Glue face to the front of the organizer.

6. To make the nose, trace the curve of a teaspoon, cut in half and glue to the cardboard face.
Spoon, glass, plate, spatula...... hmmm. What else can we make?


