At the risk of loosing part of my readership, I have a few confessions to make.....the first is that this is not my first blog.
My first blog, swallowed somewhere in the darkness of internet cloud storage, was a digital archive called, "Tiny Architects." I didn't work on it for very long. I'm sure you're envisioning a sweet little blog about kids building and playing, making their own stuff, designing.......actually "Tiny Architects," was a reference to another breed of little builders.....insects. Which is where my second confession comes in: I love, and am deeply fascinated by insects.......

Ichneumon Wasps on the Appalachain Trail by Amber
As a kid, I was an avid collector. I reared monster silk worm caterpillars, and staged sleep overs in our camper trailer with a white sheet and black light to attract night flyers at the back of our family's sheep farm.
A good portion of every summer was spent in pursuit of the elusive and luminescent Green Tiger beetle; not to mention the lightening fast, Green Darner dragonfly. Once I was thrown into a tree (butterfly net in hand) by our ill-tempered pony during an attempt to ride him bare-back to one of my favorite collecting spots.
In the back of my mind, I always thought that I would someday become an entomologist, and truth be told, maybe someday I still will. Until then, I feel it's time to begin to share my bug collecting passion with my young daughters, and hopefully you too, as insect collecting relates to cardboard... and hey! you will be surprised.....

First of all a few notes on the evolution of entomology. While insects are some of the most populous creatures on earth, I no longer believe that it's a good idea to continue the old catch and kill practices that I learned as a kid. Save that job for real entomologists.
For one, we now have the ability to capture beautiful images of insects with smart phones and digital cameras. Photos last longer and I would argue are even more informative because they can capture the insect in it's natural habitat, practicing it's natural behavior.
If your child is an insect lover, I highly recommend the gift of a child-friendly digital camera with a good macro feature. It could also become a springboard for them to document their collection online in a blog, or through some other kind of digital format.
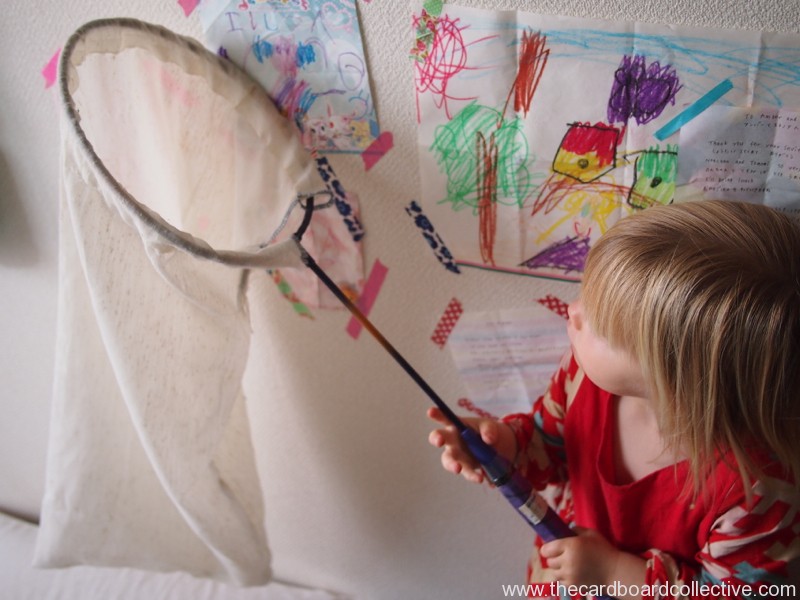
That being said, I do think it's still valuable for children to handle and examine both living and deceased insects and I think it's still entirely possible to do both of those things with a conservationist mindset. When it comes to live insects, we practice catch and release, and the girls use small nets I made them from re-purposed Badminton rackets. If we find something really interesting we observe it for no more than a day, and then release it again.
In terms of collecting, we have amassed a great little collection of insects that were found dead during various walks and bike rides. Those finds have been more than adequate for building a specimen collection.
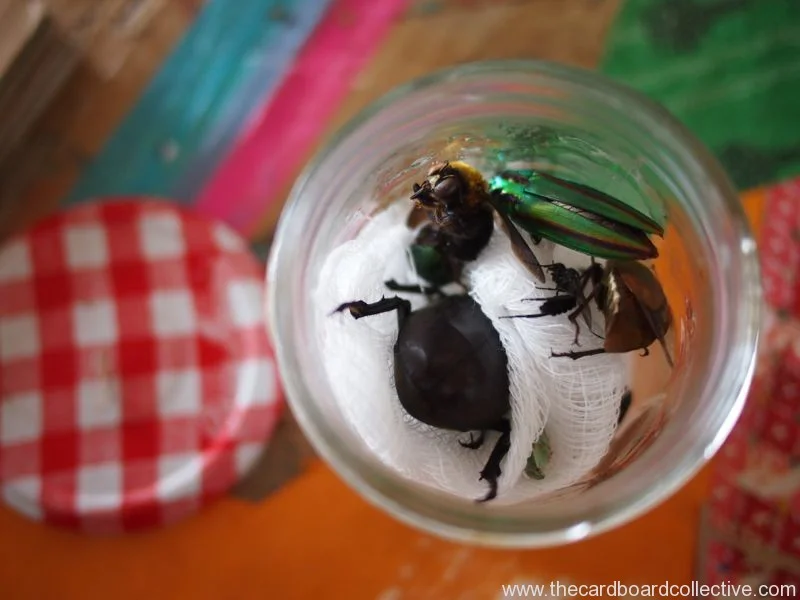
Our prized creatures have been sitting in a small jar at the back of our freezer for quite a while now though, so if you're ready to learn how to pin an insect, right here, right now, we're primed to get started........of course, we'll need to build a little something out of cardboard first.


A spreading board is used to get the body of the insect into the correct position. The wings should rest at their natural level so that they can be arranged and left to harden. First put a pin through the body of the insect. (Pinning position diagrams here) Next, use insect pins and strips of paper to gently leverage the wings into the desired arrangement. Never puncture a wing with a needle as it will damage your specimen. Extra information about pinning different types of insects HERE
To make the spreading board:
Cut a base piece 14cm x 20cm.
Glue 2 more piece of cardboard (6.5 cm x 20 cm) on top so that you create a gap that is 1-1.5 cm wide and about 1 cm deep.
If your insect's body has hardened, it's a good idea to sandwich it between 2 pieces of a dampened cloth and wait (usually overnight) for the body to soften and become easier to work with.
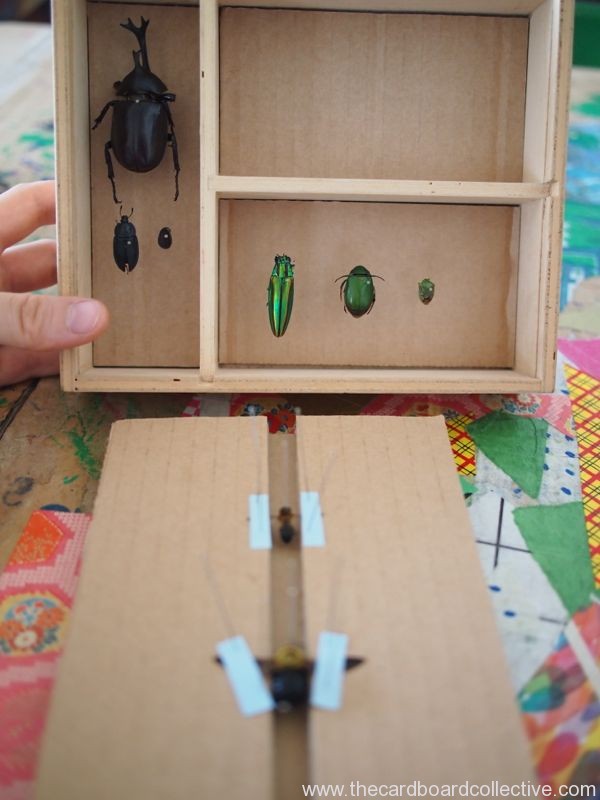
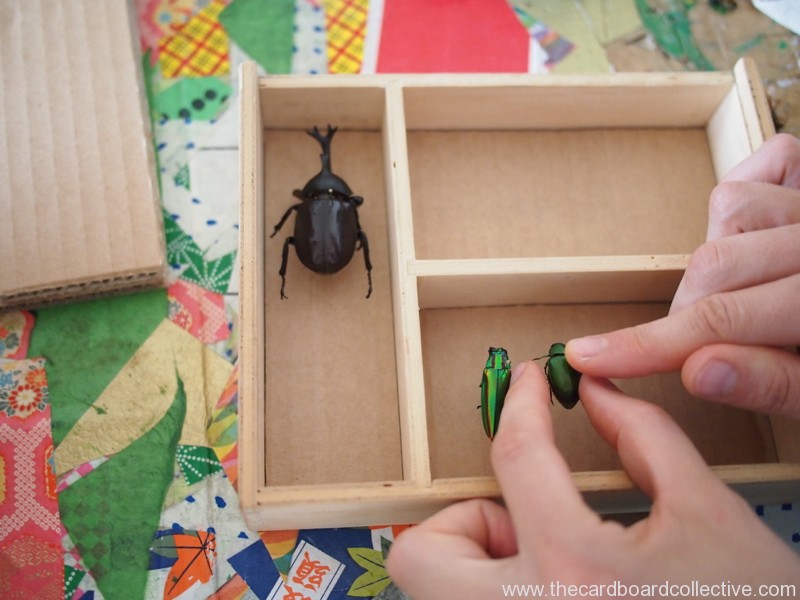
This is a collection for my daughters who are 2 and 4, so we've tried to keep it simple. I haven't added labels, (but you can) And we did not arrange our insects by scientific order. The girls chose the groupings of "Black Beetles," "Shiny Green Beetles," and " Bees."
To mount the collection, we found an old container that held craft supplies, and glued cardboard to the base so we could stick our pins in it. To preserve the insects and protect them from an infestation, make sure you have a tight fitting lid for your case. Add cedar oil either on a cotton ball nestled in a plastic cap or by wiping the insides of your wooden display case with it.

This is just our little starter collection, but it's fun to remember when we found these insects and have funny conversations about what ants eat, and where caterpillars sleep at night.
I hope I can nurture in the girls the same love for nature that my parents gave me, even if they don't go as far as someday staging a bug collecting sleep-over. I've already got the perfect one planned.